At this point, we have an app with some great features running, but maybe you would like to have a view with another design for this specific use case. I think we can make our app look a lot fancier if we add a workflow view. To give you an idea of what I’m talking about, here is how it would look:
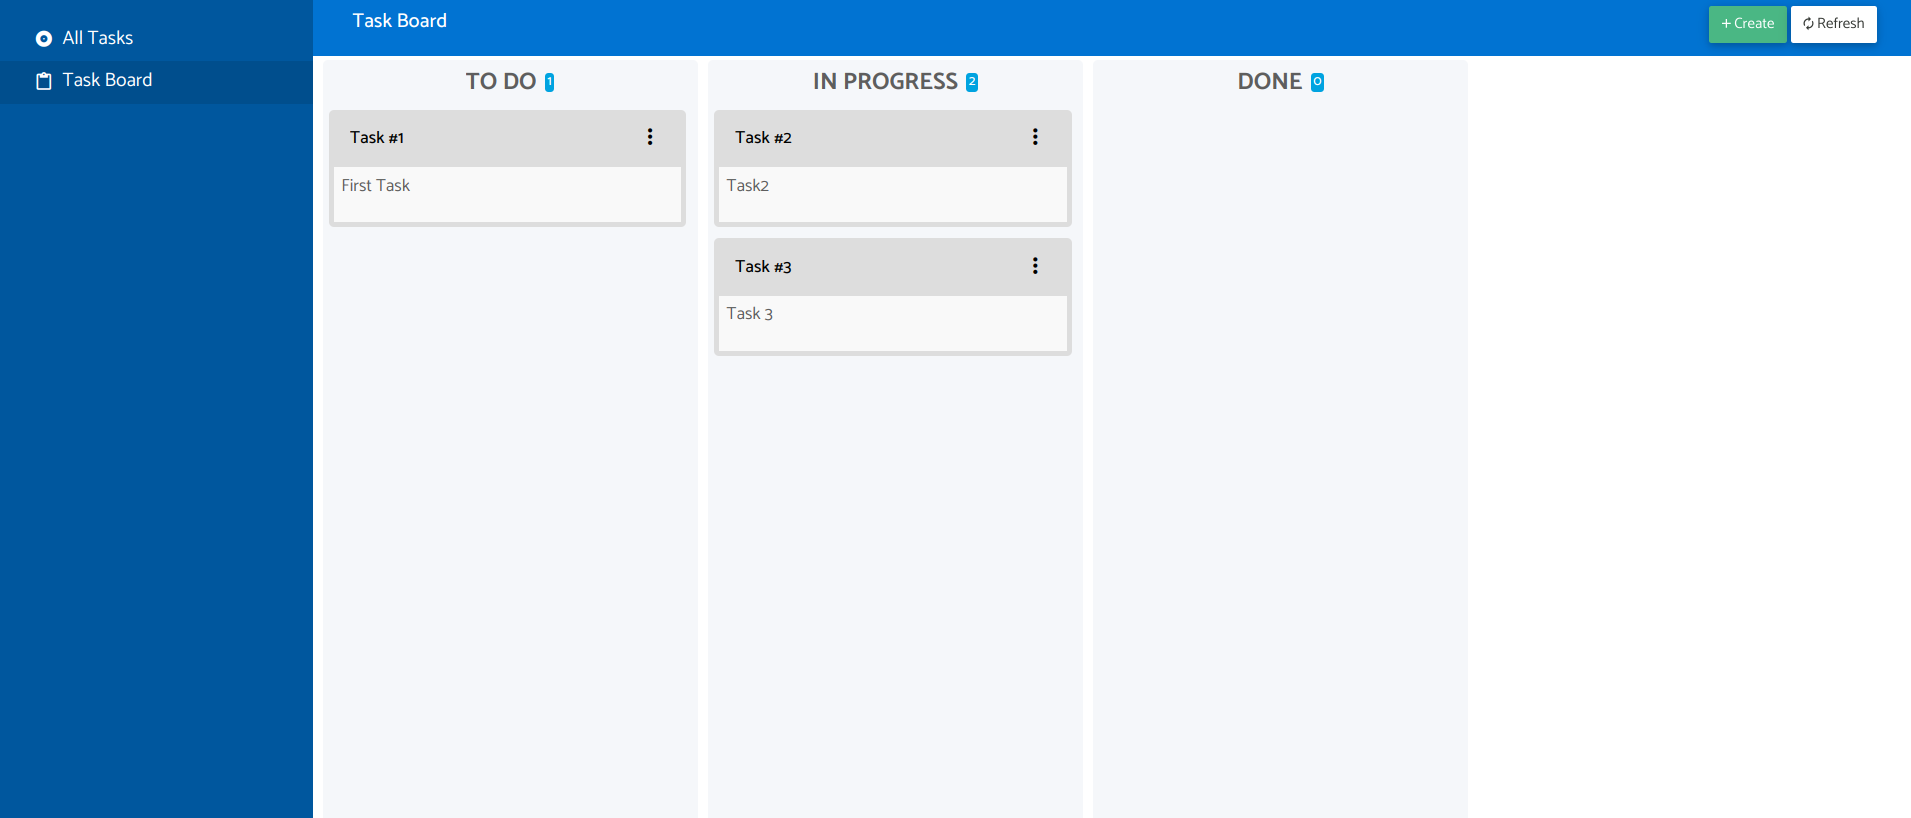
Awesome right? Let’s create the workflow view:
- Right-click on the node
Model > Entities > Tasks > Views, a dropdown menu will be shown, clickNew view > Workflow view. - Fill in the form with:
Label: Task BoardName: taskBoard
- Click on
Create and edit.
Once the workflow view is created, you will be seeing its configuration details. The first thing to do is to set up the card settings:
- In the setting
HeaderselectScriptand put the following code in the body of the function:return 'Task #' + record.field('number').val(); - In the setting
SummaryleaveFieldselected and in theSummary fieldselectTitle. - Save changes by clicking on
Apply.
Now we should define the columns, but before doing that we will add a new field to the entity that will be needed to allow ranking records:
- Right-click on the node
Model > Entities > Tasks > Fields, a dropdown menu will be shown, clickNew Field. - Fill in the form with:
Label: RankName: rankType: Rank
- Click on
Create and editto save it. - Go to the tab
Display options. - Set the option
VisibletoNever. This is to hide this field as we don’t want to show it to our users, we just will use it internally to keep the rank of tasks. - Click on
Saveto save changes.
![]()
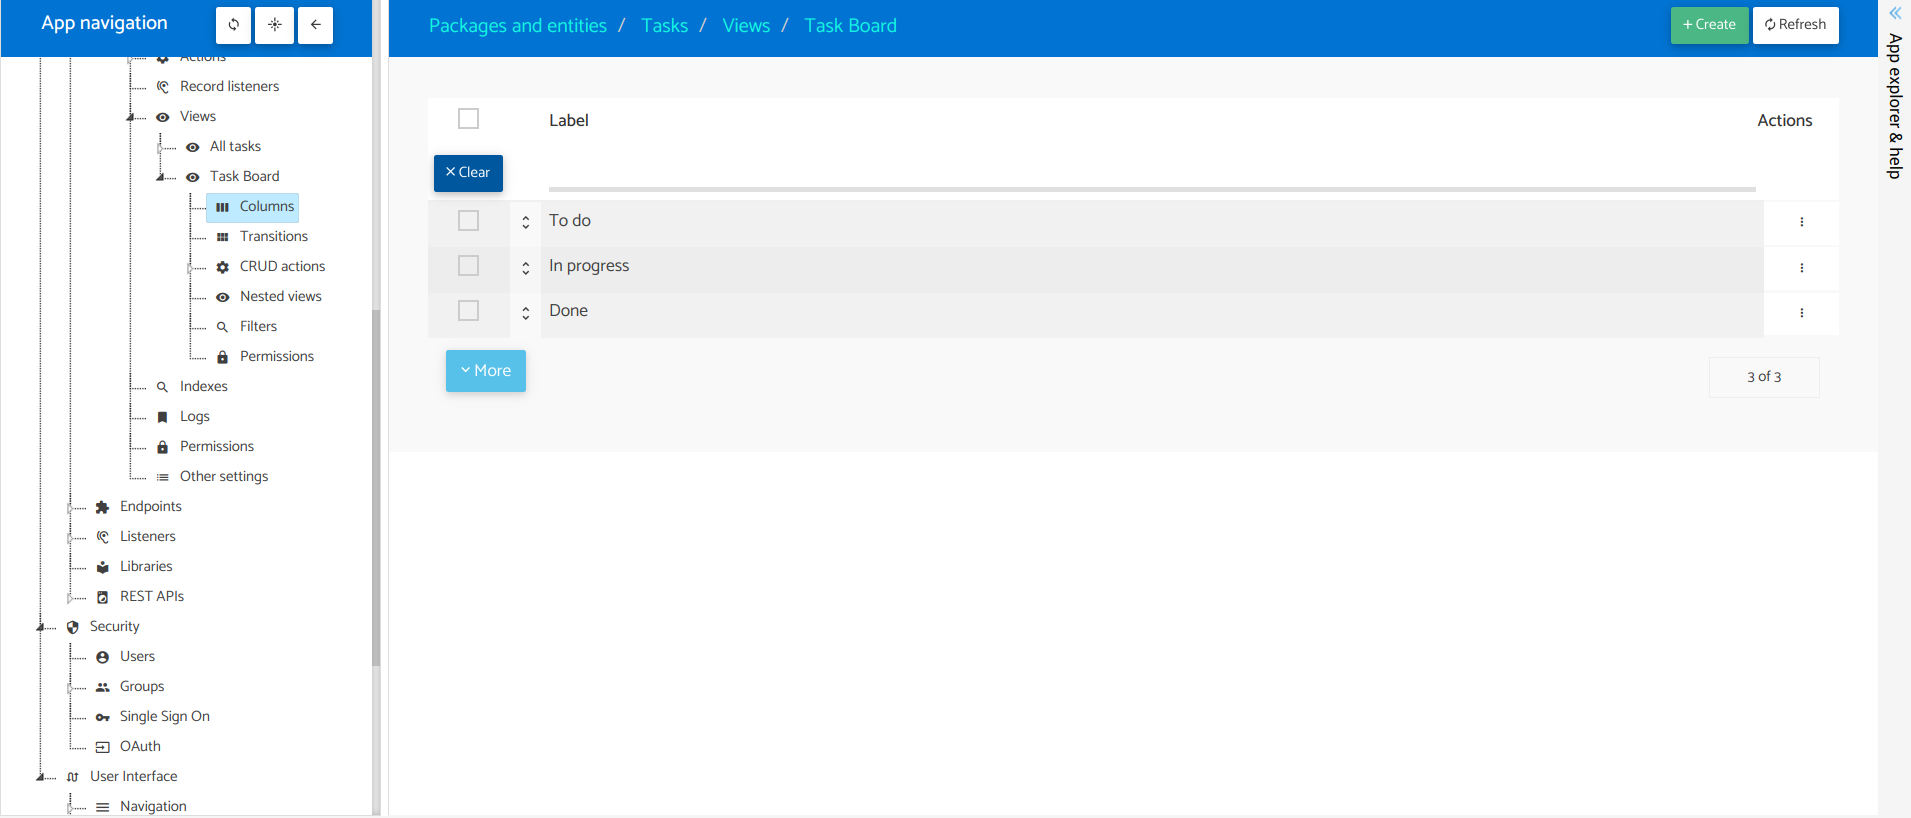
Now we are ready to create the columns in the workflow view:
- Click on the node
Model > Entities > Tasks > Views > Task board > Columns. - Click on the
Createbutton on the top-right of the page. - Fill in the form with:
Label: To doFilters: Status equals To do
- Set the flag
Allow to rank recordsand select the fieldRankinRank field - Click on
Createto save the column.
Repeat the same process to create these two additional columns:
| Label | Filters |
|---|---|
| In progress |
|
| Done |
|
- Once you have the columns we need to define the transitions that will allow moving a card from one column to another:
- Click on the node Model > Entities > Tasks > Views > Task board > Transitions.
- Click on the Create button on the top-right of the page.
- Fill in the form with:
- Label: Start work
- Source column: To do
- Target column: In progress
- Action: Start work (tasksStartWork)
- Click on Create to save the transition.
Repeat the same process to create these other transitions:
| Label | Source column | Target column | Action |
|---|---|---|---|
| Complete | In progress | Done | Complete (tasksComplete) |
| Stop work | In progress | To do | Stop work (tasksStopWork) |
| Reopen from done | Done | To do | Reopen (tasksReopen) |
We are almost there! Let’s do a few improvements:
- Click on the node
Model > Entities > Tasks > Views > Task board > CRUD actions > Tasks. - For
Create,ReadandUpdateset the flagOpen in modaltoactiveand click onApply. This will allow the opening of tasks in a modal. - Click on the node
Model > Entities > Tasks > Views > Task board. - Inside
Cards settings, in the settingRecord menuselectSome. - Then in
Available actionsclick onAddand select the actionArchive (tasksArchive). This is to be able to archive tasks because we didn’t create a column for theArchivedstatus to keep this view clean.
Finally, let’s add the new view to the navigation:
- Click on the node
User interface > Navigation > Main menu. - Click on the
Add new menu entrybutton on the top-right of the page and selectAdd view entry. - Fill in the form with:
View: Task boardLabel: Task boardIcon: select the one you like the most!
- Click on
Createto save the menu entry.
Great! We are done. I know this section was difficult so thanks for sticking with it. Now let’s just push the changes and open the runtime tab. In the next section, we are going to see the changes we have made. Next section: The workflow view.