Welcome back to the builder. In this section, we are going to be working with the actions of an entity. So let’s get to work.
We already have the basic operations to create, edit and delete tasks. However, it would be better to have a custom workflow that enforces some rules. For example, a task can only be moved to In progress if it is in the status To do.
To create the workflow we will do the following things:
- Create actions to move the issue through the different statuses.
- Do not allow modification of the status manually.
Let’s create a new action:
- Right-click on the node
Model > Entities > Tasks > Actions, a dropdown menu will be shown, clickNew Action. - Fill in the form with:
Label: Start workName: startWork.
-
In
Preconditionsyou will indicate in which cases the action can be executed. For the actionstartWork, the precondition is that the fieldStatusmust beTo do. This can be indicated with an expression, so select the optionExpressionforPreconditions. Then you will need to set up the following expression by clicking onAdd new ruleand configure it like this: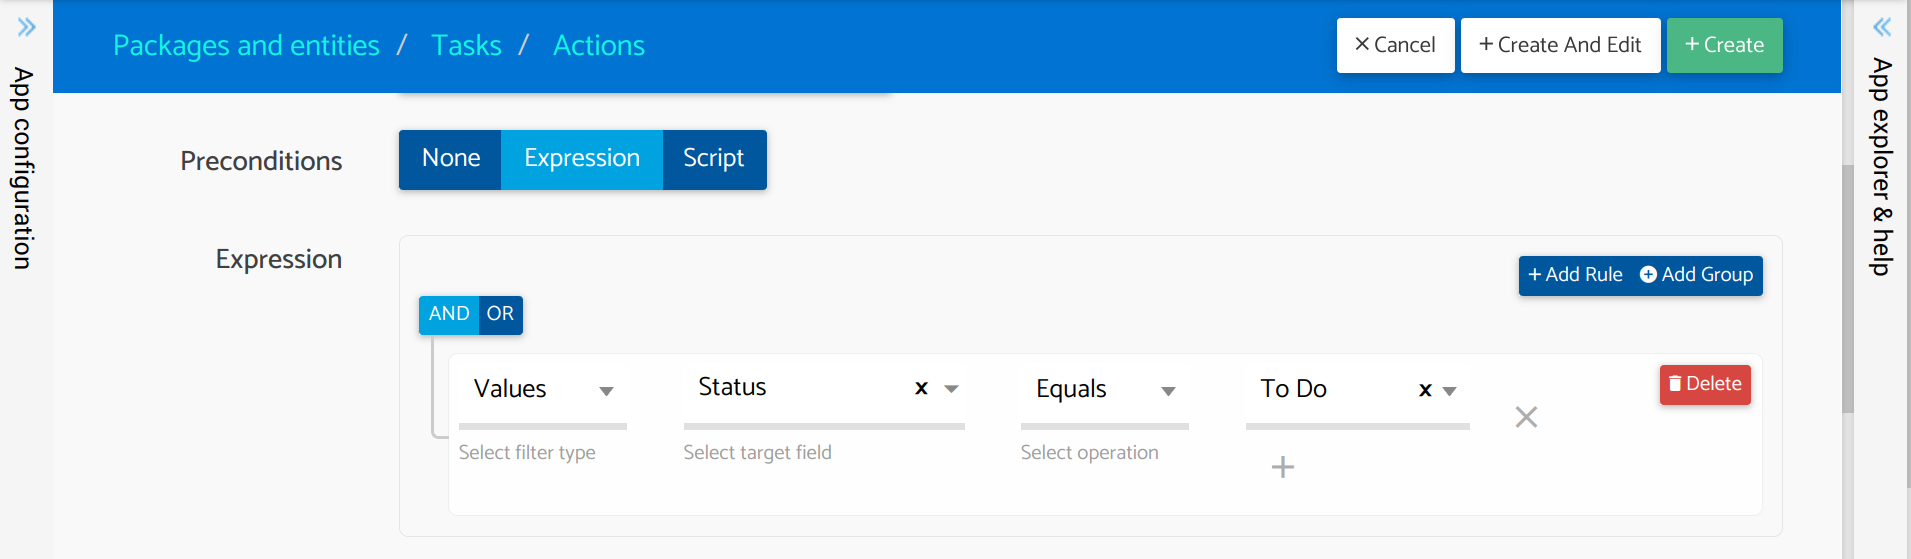
- In the field
Action scriptadd the following script to the body of the function:
   record.lock(function(record) {
       record.field('status').val('inProgress');
       sys.data.save(record);
   });
Great I hope you understood what we did. Now it’s your turn. Add the following actions:
| Label | Name | Precondition | Action script |
|---|---|---|---|
| Complete | complete |
|
|
| Archive | archive |
|
|
| Stop work | stopWork |
|
|
| Reopen | reopen |
|
|
Good, now we have all the actions to manage the workflow! However, there is one problem: anyone can just change the status field by simply editing the task. This is not what we want; instead, we want to enforce people to follow the workflow we defined.
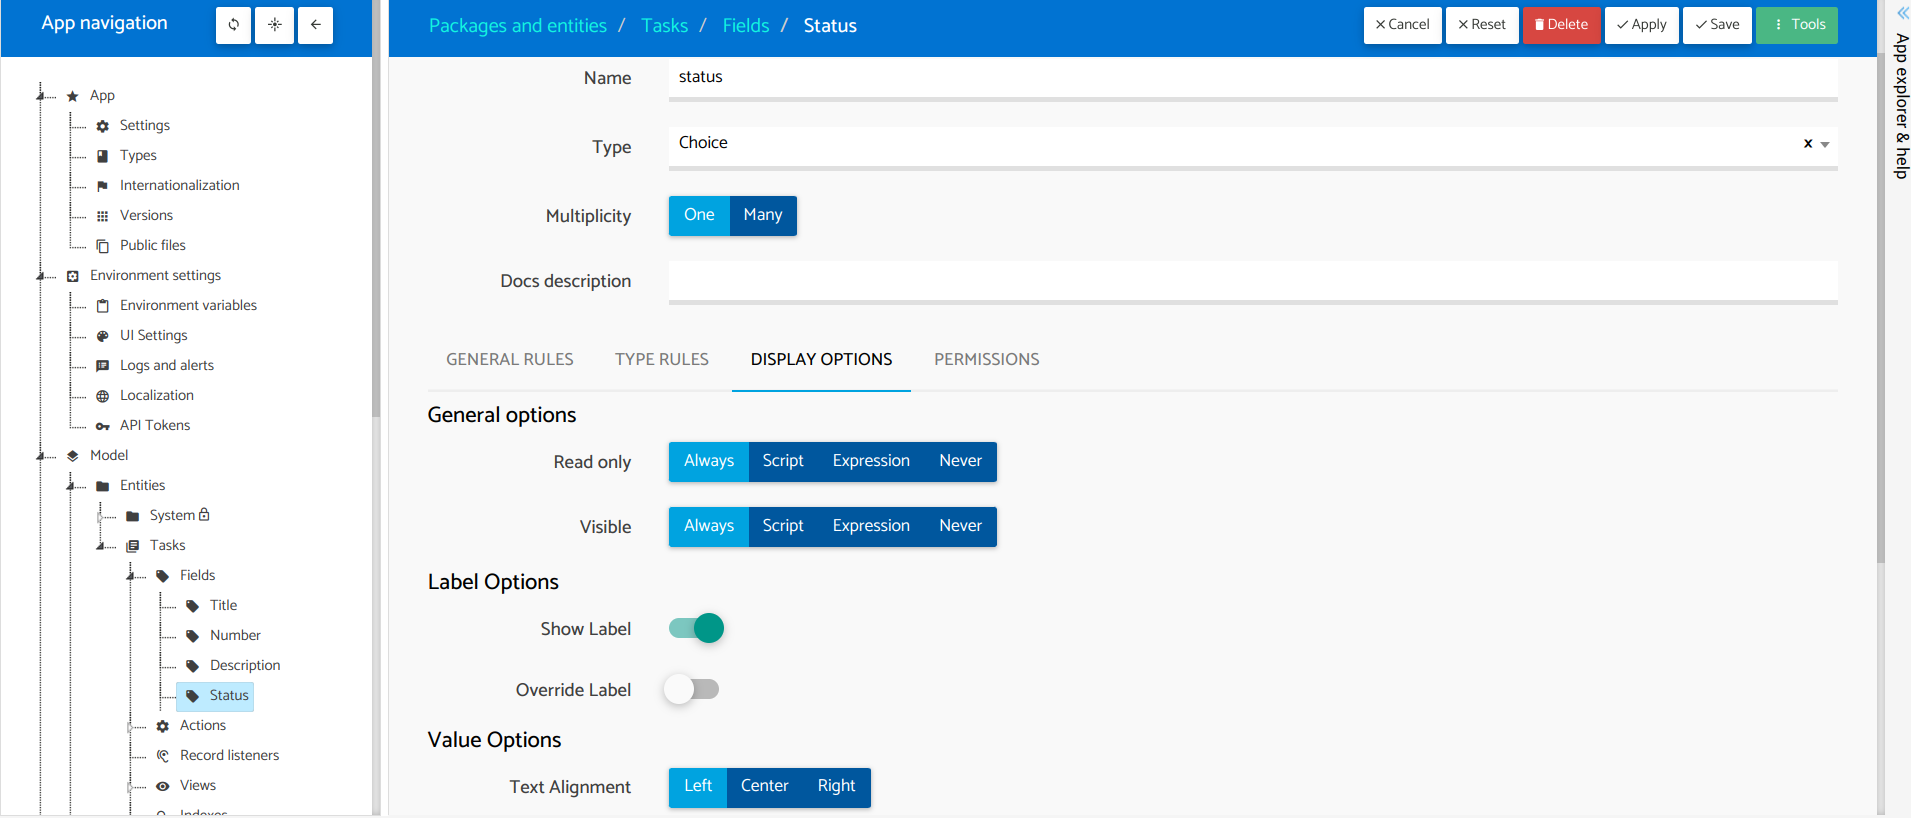
To prevent people from changing the status in an invalid way, what we will do is make it read-only:
- Click on the node
Model > Entities > Tasks > Fields > Status. - Select the tab
Display options. - For the option
Read onlyselectAlways. - Save changes by clicking on
Apply.
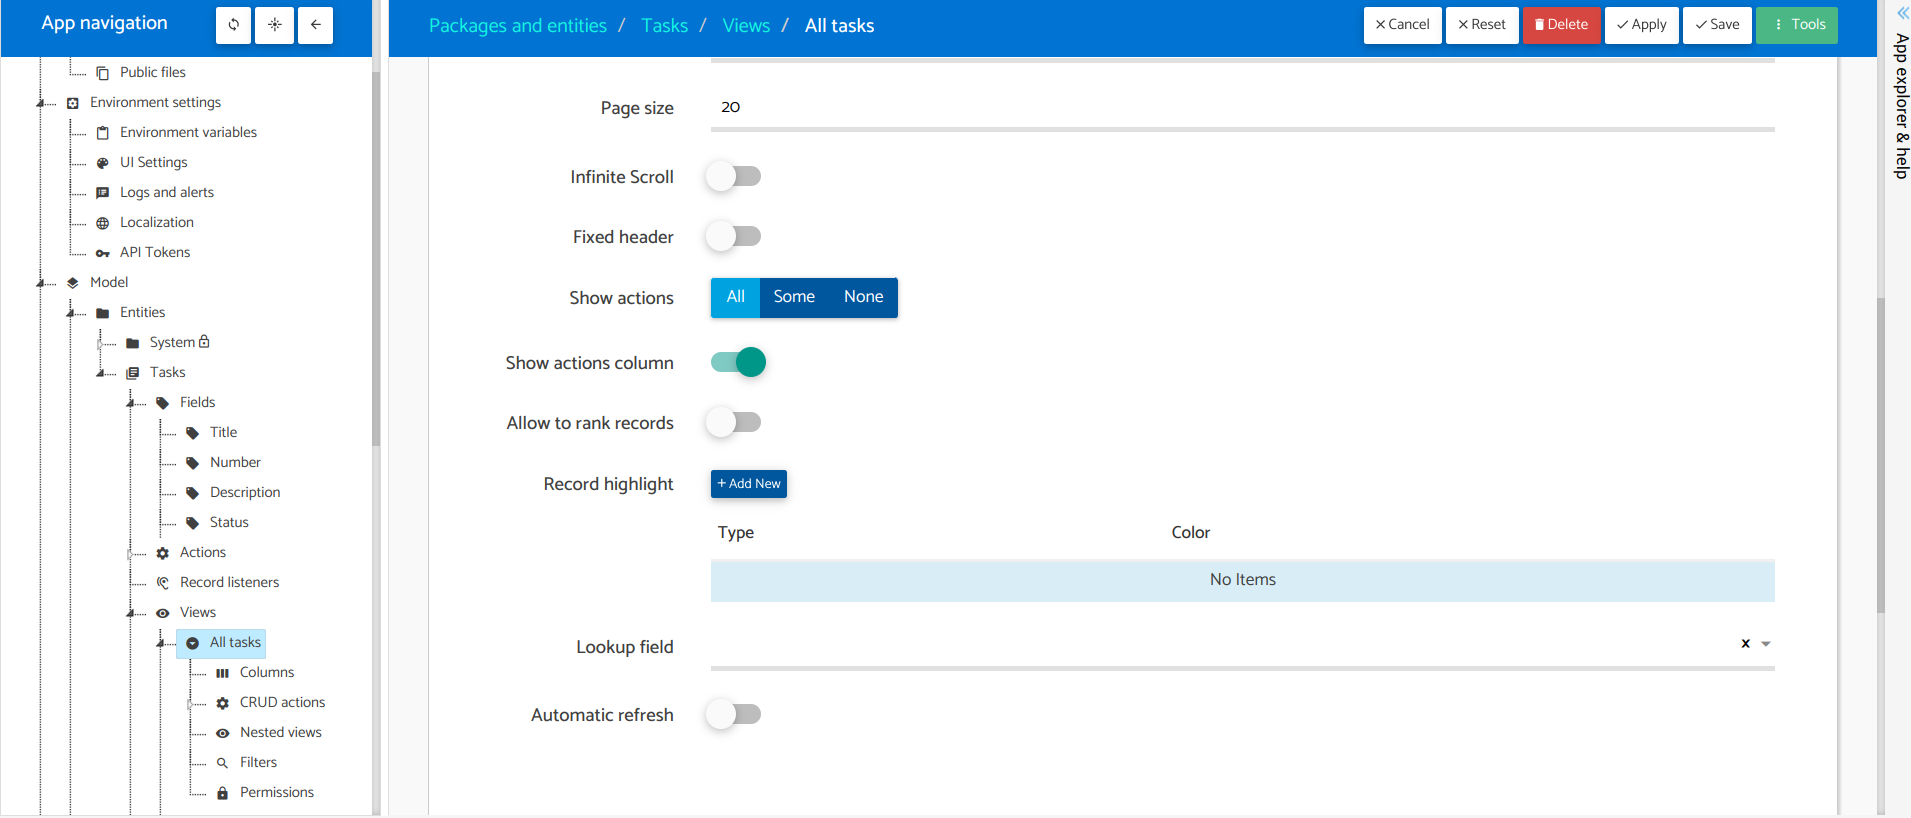
Finally, we will add a column to the grid view that shows the actions available for that record. Follow these steps:
- Click on the node
Model > Entities > Tasks > Views > All tasks. - Inside
List settings, set the optionRecord menutoAlland set the flagDisplay record menu columntoactive. - Save changes by clicking on
Apply.
Awesome! Go ahead and push the changes. Remember, to do that, you need to click the icon next to your username (The hamburger icon). A drop-down menu will be shown and then click Push changes.
Let’s wrap this session here. Go to the runtime tab and we will continue on to the next session Testing Actions on runtime.